Choregraphe
Choregraphe is a multi-platform desktop application, allowing you to:
- Create animations, behaviors and dialogs,
- Test them on a simulated robot, or directly on a real one,
- Monitor and control you robot,
- Enrich Choregraphe behaviors with your own Python code.
As always, visit the official documentation for more information.
Installation
For installation, follow Aldebaran’s official installation guide at: Aldebaran’s installation guide
Choregraphe: Quick Navigation

Choregraphe GUI
- Project files: These are the files for your current project.
- Box libraries: This contains behaviors that you will use throughout your projects.
- Essentially your canvas. You drag and drop your behaviors here.
- Log viewer: A log for debugging purposes.
- Robot view: Essentially helps with what NAO is seeing and its surroundings.
- Inspector: Gives information about your behaviors and other items.
Creating A Behavior
Launch Choregraphe and create a new project through the File menu. By default, you should have the Box libraries window on the bottom left. Click the search icon (Show Filter button) and type in “say” in the text box. Drag and drop the behavior “Say” into your canvas.

onStart buttons
Next, click the onStart button, hold, and drag over to the onStart button of the Say behavior. Likewise, connect the onStopped button on the Say behavior to the right-most onStopped button.

Final connections
The figure above demonstrates the final connections.
Next, click the wrench in the Say behavior. This will open the Set Parameter box. You can play around with the voice shaping and speed parameters to your liking. In the Text box, NAO will say whatever is typed here. To play, simply hit the Play button (f5) found above the canvas.
I suggest to explore the folders in the Box library window to get a sense of the different behaviors you can work with.
Connect Different Behaviors
You can connect different behaviors to create a more complex behavior.
With enough playing around, you can create something like this:

A simple behavior which demonstrates the usage of conditional Switch Cases, speech recognition, say, and face detection.
In this behavior, it uses NAO’s speech recognition behavior to catch a phrase. Speech recognition loops until you say any phrase. In this case, the phrase “Am I a human?” or “Am I a dog?” will activate a switch case statement that responds accordingly. If NAO can’t recognize what you said, it will run the bottom branch of the speech recognition behavior, the onNothing button. Otherwise once the phrase is processed, NAO responds accordingly. You can even use the Play Sound behavior to play audio files. In the project above, NAO plays a dog barking sound.
You can download this behavior from my GitLab.
Transfering a Behavior to your NAO
Once you are finished with a behavior and testing it out, you can upload it into NAO’s memory so it can play it any time.

Package and install button
To upload it, click on the Robot application tab in the inspector window. Next click the Package and install button as shown above. Once this is done, you have to configure the trigger words to activate the behavior.
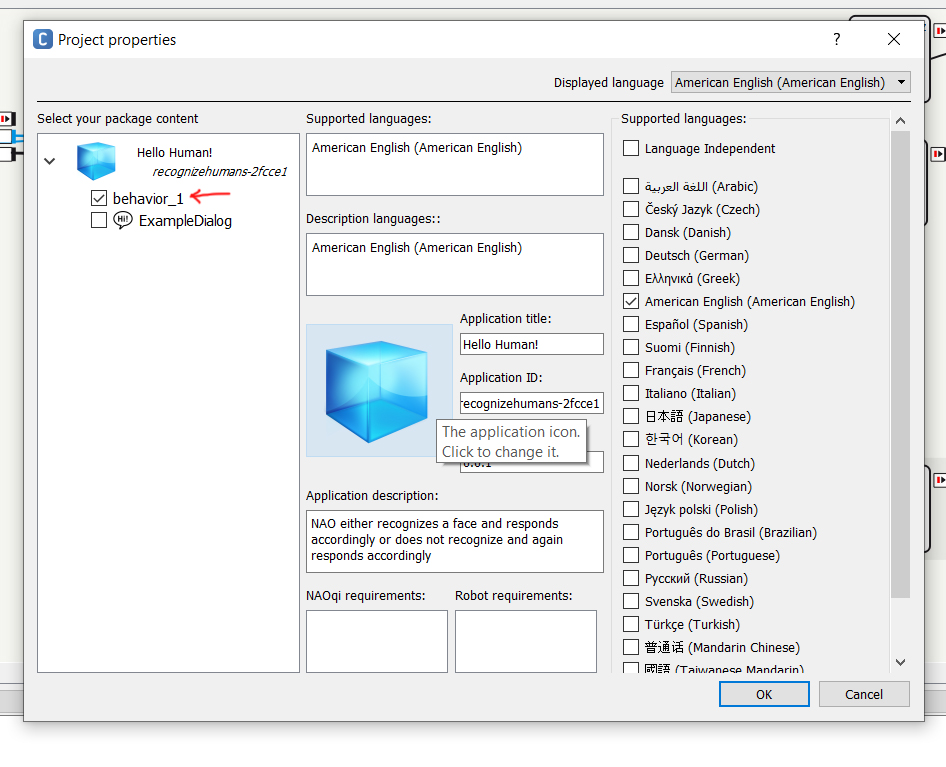
Click where the red arrows points to
To do so, click on the Properties button located in the Project files window. Next click the behavior_1 (default name) property to access more settings.
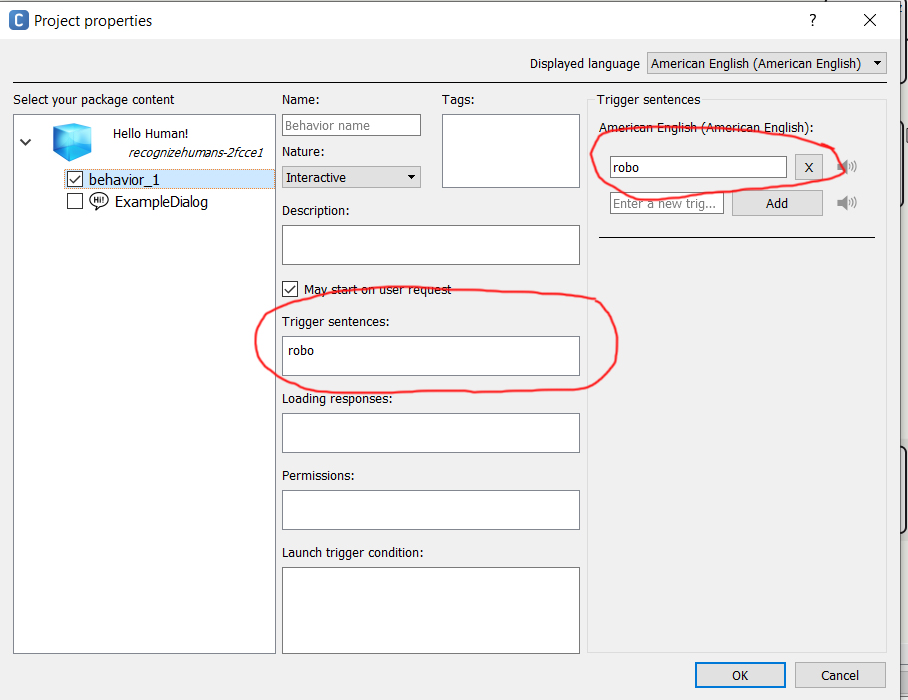
You enter your trigger word or sentence in the far right option
On the far right we have the Trigger sentences text box. Enter in a word such as “robo” and hit Add. It will automatically populate the middle Trigger sentences box. Once finished, you can disconnect your NAO robot Now simply say your trigger word and wait for NAO to go into its listening mode.
If everything worked out good, NAO should do whatever you tell it to do. For more information, visit the offical documentation.